Starting beekeeping in Kenya means getting the right equipment from day one. After 18 years of supplying beekeepers across the country, we’ve seen what works and what wastes money. This guide breaks down exactly what you need, why you need it, and what to look for when buying bee keeping equipment in Kenya.
Why Equipment Matters More Than You Think
Most beginner beekeepers in Kenya make the same mistake: they buy a hive first and protective gear later. Then they can’t inspect their colony safely, the bees become defensive, and what should be a smooth start becomes stressful.
Your equipment determines three things:
- your safety,
- your efficiency, and
- whether your bees thrive or struggle.
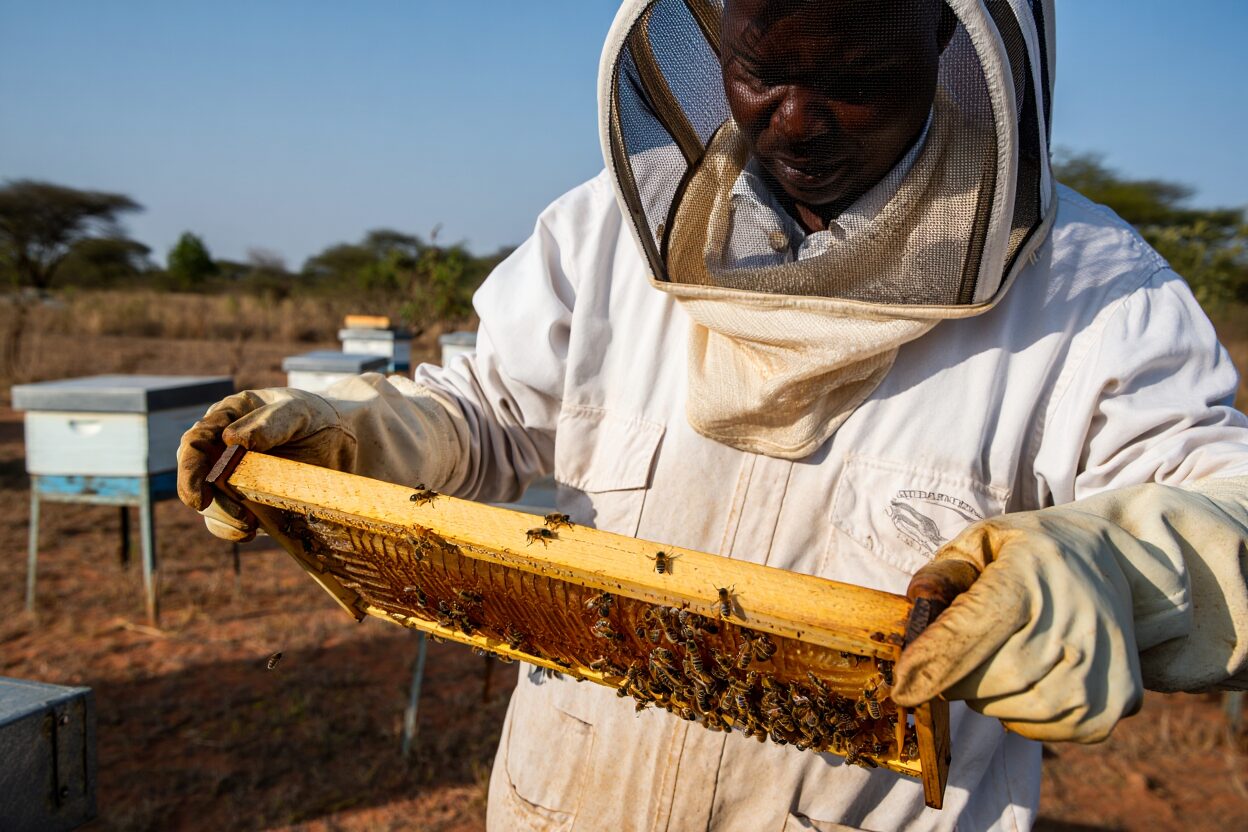
In Kenya’s climate, where afternoon temperatures can hit 30°C and bee species like Apis mellifera scutellata are naturally defensive, proper equipment isn’t optional.
This checklist follows the order you should buy, not the order most people think about.
1. Protective Gear: Buy This First
Full-Body Beesuit
A complete beesuit is your first purchase, not your third or fourth. Without proper protection, you can’t inspect hives safely, and nervous beekeepers make bees more aggressive.
What to look for:
- Full-body coverage from head to ankles
- The type of material. We currently recommend the satin beesuit over all others
- Heavy duty rubber gloves
- Fencing-style veil with clear visibility
You want breathable material that still provides protection. Most of our customers choose satin suits because they balance durability with ventilation.

Gloves
From our experience rubber gloves work better than leather because they’re easier to clean and don’t absorb propolis or honey into the fabric.
2. The Beehive and Stand: Your Colony’s Home
Choosing Your Hive Type
Kenya uses two main hive types: Langstroth and Kenya Top Bar Hives (KTBH). Your choice affects everything else you buy.
Langstroth hives:
- Stackable boxes (brood box + honey supers)
- Removable frames with foundation
- Standard equipment fits all Langstroth hives
- Better for beekeepers planning to scale

Kenya Top Bar Hives:
- Simpler design, horizontal layout
- Bars instead of frames (bees build natural comb)
- Lower investment cost
- Easier inspection for beginners
- Popular in rural areas

Most commercial beekeepers in Kenya use Langstroth because yields matter. Small scale farmers often prefer KTBH because initial costs are lower and bees build natural comb without foundation.
The Beehive Stand: Not Optional
A beehive stand keeps your hive off the ground. This matters in Kenya for three reasons:
- Safari ants: Ground-level hives attract safari ants, which can destroy weak colonies
- Flooding: During heavy rains, ground moisture damages wooden hives
- Inspection comfort: Working at waist height prevents back strain during regular inspections
Your stand should elevate the hive 40-50cm off the ground. Metal stands last longer than wood but cost more upfront. Wooden stands work fine if you treat the legs with used engine oil (prevents termite damage).

What Quantity of Bee Hive to Start With
There is no set number. You can start with one, and you can still start with 5. Any number that is manageable is okay. We’ve usually see 50 beehives in one go take alot longer to colonize and work out compared to a few hives in batches
3. Essential Hive Tools
Hive Tool
This flat metal bar is the most-used item in your toolkit. It pries apart boxes (bees glue everything with propolis), lifts frames, scrapes wax, and removes burr comb.
Buy a quality hive tool from the start, cheap ones bend and rust after a few uses. Our standard 10-inch hive tool costs Ksh 550 and lasts years. Some beekeepers prefer J-hooks (curved end) for lifting frames, but the straight version works for everything.
Smoker
A bee smoker calms bees during inspections by masking alarm pheromones and triggering their instinct to engorge on honey. In Kenya, smokers are essential because Apis mellifera scutellata subspecies are more defensive than European bees.

Using a smoker correctly:
- Fuel options include: dried corn cobs, coconut husks, we have always preferred wood shavings (very dry)
- Light the fuel, pump the bellows until you get cool white smoke (hot smoke burns bees)
- Puff 2-3 times at the entrance, wait 30 seconds, then open the hive
- Puff lightly across the frames during inspection
Don’t over-smoke. Too much smoke agitates bees instead of calming them.
Bee Brush
A soft-bristle brush gently removes bees from frames during inspections without crushing them. This matters during honey harvest, crushed bees release alarm pheromones that make the rest of the colony aggressive.
Natural fiber brushes (sisal) work well and don’t retain moisture, easiest and simplest option if you absolutely can’t find your bee brush
4. Honey Harvesting Equipment
You won’t harvest honey for 3-4 months after your bees move in, but plan ahead. Harvesting with wrong equipment damages comb and reduces future yields.
Uncapping Tools
Before extracting honey, you remove the wax caps bees put on cells. In Kenyan market, we have three tools work (you can choose one from these, they all do the same function):
- Electric Uncapping knife: Heated knife slices off caps cleanly, needs to be plugged in to electricity
- Uncapping fork: Scratches off caps without heat (slower but no electricity needed)
- Uncapping knife/Hive took: Versatile tool combining the uncapping knife with a hive tool
Start with an uncapping fork. Buy a heated knife later if you’re harvesting 20+ frames per session. The hive tool with uncapping knife combines 2 different tools in one.
Honey Extractor
An extractor spins frames using centrifugal force, pulling honey out without destroying comb. This means bees can reuse comb instead of rebuilding it, saving them weeks of work and increasing your yields.
Centrifuge Honey Extractor types available in Kenya:
- Manual 2-frame honey extractor tangential: Ksh 25,000 (good for 1-10 hives)
- Manual 3-frame honey extractor radial: Ksh 35,000 (10+ hives)
- Manual 4-frame honey extractor radial: Ksh 45,000 (best for 20+ hives)
- Electric honey extractors: Ksh 80,000+ (for commercial operations)
If you can’t afford an extractor immediately, crush-and-strain works but destroys comb. Bees spend 3-4kg of honey producing 1kg of wax, so saving comb matters.
Alternative: Honey Press
For Kenya Top Bar Hives, presses work better than extractors because KTBH comb isn’t in frames. A simple honey press crushes comb and filters honey through mesh. Cost: Ksh 25,000.

Straining Equipment
Raw extracted honey contains wax particles and bee parts. Strain it through:
- Double Honey Strainer has both a coarse sieve (first pass): Removes large debris and a fine mesh sieve (second pass): Removes small particles
- Settling tank (optional): Gravity separation over 24-48 hours
Double-straining produces clear honey that customers prefer.
5. Storage and Handling Equipment
Food-Grade Buckets
You need buckets at every stage: catching honey from the extractor, settling, and storage. Use only food-grade plastic
Standard sizes in Kenya:
- 5-liter buckets: Small-batch processing
- 10-liter buckets: Medium operations (2-5 hives)
- 20-liter buckets: Bulk storage and settling
Buy buckets with tight-sealing lids. Honey absorbs moisture from air, and humidity (especially near the coast) can increase water content above KEBS limits (20% max).
Settling Tanks
After straining, let honey settle in a tank with a bottom tap (honey gate). Air bubbles and remaining particles rise over 24-48 hours. Draw clean honey from the bottom tap into containers.
Storage Containers
For selling honey:
- 250g-500g jars: Retail customers
- 1kg jars: Common household size
- 5kg buckets: Bulk buyers (hotels, bakeries)
6. Supplementary Equipment
These items help but aren’t essential for your first year:
Feeders
Sugar syrup feeders supplement bees during nectar dearth. Entrance feeders (Ksh 300) work for small colonies. Frame feeders (Ksh 500) sit inside the hive for larger amounts.
Most beekeepers only feed during extreme drought or when establishing new colonies. Mature colonies in good locations rarely need feeding.
Queen Excluder
This metal grid sits between brood box and honey supers. Worker bees pass through but the larger queen can’t, keeping brood out of honey frames. Its a good idea to have a spare if your beehives are older. These tend to sag with years and might give slight edges for the queen to pass
Swarm Lures and Bait Hives
Swarm lures (propolis-scented attractants) cost Ksh 1350 and increase your chances of capturing swarms. Apply inside bait hives placed 2-3 meters high in trees. Swarming season in Kenya peaks March-May and September-November.

8. What to Buy First:
Don’t buy everything at once. Focus on protection and basic hive management first. Harvesting equipment can wait until your bees build up, a new colony needs 3-4 months before producing surplus honey.
9. Common Equipment Mistakes Kenyan Beginners Make
Buying too many hives too soon: One successful hive teaches you more than three empty ones. Master colony management before expanding.
Skipping the stand: Ground-level hives invite problems. A Ksh 1,500 stand saves you from colony losses worth Ksh 5,000+.
Cheap protective gear: A single sting through poor-quality fabric can make you afraid of your bees. This fear transfers to the colony and makes inspections stressful for everyone.
No smoker fuel preparation: Collect dry fuel during the dry season. Wet fuel won’t light, and you can’t inspect without smoke.


